Showing posts with label Dessert Recipe. Show all posts

Friday, September 2, 2016

Chicken Macaroni Salad

During Holidays my mother will always make Chicken Macaroni Salad. It is one of her specialty. I remember back then when I was a kid, I would watch her prepare the ingredients. It is not because I want to learn how to make it but I would be there in her side just to eat some ingredients like the cheese that she already cut into cubes and the nata de coco which is my favorite. I was never interested in cooking during my younger age. I only learn to love cooking when I got married and be separated from my parents. I miss her cooking. She is a wonderful cook. Unlike me, I still need to measure everything and look for recipe guides. My mom would just use a dash of this or a pinch of that. She dips her finger to the ingredients before she cooks it to know if its ok or she might need to add more. Of course except for raw meats.
Back to the recipe, this Chicken Macaroni Salad is a Filipino version since Kaong and Nata de Coco are added to make it more colorful and adding sweet flavor to the sourness of the mayonnaise. The colors of Christmas are present in this dish which is green and red. Don’t forget to include this in your Noche Buena.
You will need:


400g elbow macaroni pasta, cooked
¼ kilo chicken meat, cooked and shredded it small pieces.
1 cup kaong (red), drained
1 cup kaong (green), drained
2 cup nata de coco, drained
1 cup pineapple chunks, drained
1 carrot, diced, boiled
1 cup raisins
¼ cup sweet pickle relish
1 tsp. finely minced onion.
1/4 cup condensed milk
1 cup all purpose cream
1 ½ cup mayonnaise
1 cup cheese, diced (I like the Eden cheese Brand)
Salt and pepper to taste.

Steps:

Cook the macaroni pasta according to the package instruction. 
Once cooked, rinse it with cold water, drain and set it aside. 
Boil the chicken, drain and shred it to small pieces then set aside. 
Cut carrots into small cubes, boil, drain and set aside.  
Prepare the other ingredients, strain nata de coco and kaong and 
pineapple chunks for half an hour or until 
almost all liquid has been separated. 
Slice the pineapple if you find the chunks big. 
Cut the cheese into cubes. 
Finely chop the onions.   
In a large mixing bowl, mix the macaroni, chicken, 
carrots, nata de coco, kaong, pineapple, raisins, 
cheese, onion and pickles. 
Pour the mayonnaise, cream, condensed milk, 
a pinch of salt and a dash of pepper and 
combine them together and mix thoroughly. 
Cover the mixing bowl with a cling plastic
 wrap and refrigerate for an hour. 
Serve!


Thursday, September 1, 2016

Red Velvet Crinckles

            Today is the first day of the “BER” months; most Filipinos specially the Christians are starting their Christmas countdown on the first day of September. I am inspired to share Christmas recipes starting with these lovely cookies “Red Velvet Crinkles”. Red is one of the colors of Christmas while the powdered sugar coating symbolizes “White Christmas”.  It refers to the snow that is present at Christmas in some countries. Kids will surely enjoy this recipe.


You will need:


1 1/2  plain flour
¾ cup of Sugar
4 Tbsp of Cocoa Powder
pinch of Salt
1 tsp of Baking Powder
1/4 cup of soften unsalted butter
(room temperature)
2 Eggs
1 tsp of Vanilla Extract
Red Food Coloring
1/2 cup of icing Sugar


Steps:
Combine the flour, cocoa powder, salt,
 baking powder, whisk it and set aside.
Cream the butter and sugar;
next put-in the vanilla and eggs.
Mix it thoroughly until it becomes creamy.
You may use manual whisk,
electric hand mixer or stand-up mixer.
Slowly combine the other dry ingredients
 that you set aside, flour mixture to the egg mixture.
 When it is well incorporated, add enough
food coloring to achieve the intense red color in your preference.
Continue mixing until the food coloring is well distributed.
Put the dough in a bowl, cover it with plastic and refrigerate
for at least an hour or you can refrigerate it overnight.
Preheat oven to 350 degrees, line the baking sheet
with parchment paper and set it aside. 
Scoop two spoons and form little balls of the dough.
Coat each ball with icing sugar and place them
2 inches apart from each other on the lined baking sheet.
Bake them for 10 minutes, remove from the oven.


Wednesday, August 31, 2016

Puto Cheese


You will need:

For the batter:
1 ½ cup Cake Flour
½ cup fresh milk
½ cup any lime soda
¼ cup sugar
1 teaspoon baking soda

For the meringue:
4 egg whites
½ cup sugar
½ tsp cream of tartar

For toppings:
Slices of cheese

Steps:
In a mixing bowl combine all ingredients for the batter and set aside.
In another mixing bowl, whisk egg white with cream of tartar using an electric hand mixer. Gradually add the sugar to form a stiff pick.
Slowly fold in the meringue into the batter.
Grease or line your puto molder then scoop the puto mixture to your individual molder.
Steam for 5 minutes then add the cheese on top. Continue steaming it for another 15 to 20 minutes or until the puto is cooked well. 
Got the idea from  “myfresha-licious” and Juliana Soldevilla
Thanks a lot! Happy Cooking!


Polvoron

The Filipino POLVORON is different from the original Polvoron in Spain (baked shortbread). It is like a powdered candy with a combination of toasted flour, milk, butter and sugar. Other ingredients may be added for flavoring like pinipig, peanuts, chocolates and more. This recipe is just the plain Polvoron. You may need a Polvoron molder which comes in different shapes. After molding, wrap it with a Japanese paper or a colored plastic cellophane. I will include this in my Christmas Recipe list and use colorful wraps.


You will need:

4 cups flour
2 cups powdered milk
1 cup butter, softened
1½ cup granulated sugar

Steps:

Toast the flour on a cooking pan until the color turns light brown. 
Stir while toasting to prevent from getting burnt. 

Remove it and transfer to a mixing bowl. Let it cool.
Add powdered milk  to the flour and stir using a wire whisk.

Add sugar and continue whisking. Add the butter and mix well.
When its well-combined, Let it stand for 10 minutes before molding it.
Use a polvoron molder and place it on a pre-cut wrapper.
You can use Japanese paper or cellophone.


Tuesday, August 30, 2016

Banana Turon

TURON is a popular dessert in the Philippines. Mostly sold as a street food. They are foods that are ready to eat, sold by vendors usually on a carts along the streets or public places like markets and also near the schools. 

It uses lumpia wrapper and sugar as its main ingredients. There are a lot of choices on what to put inside the wrapper as your filling. In this recipe, we will be using banana with jackfruit. Adding ripe jackfruit gives the turon a strong sweet smell specially when cooked. Most Filipinos will choose this over other meryendas because of its affordability and it just taste delicious. All you need are LUMPIA WRAPPER (you can make your own lumpia wrapper, I will be posting the homemade lumpia soon), slices of BANANAS (You may use other types of bananas but I prefer to use the Saba/plantain), JACKFRUIT (is an optional ingredient but it will make your turon more flavorful), SUGAR ( preferably brown) and lastly cooking OIL for deep frying.

You can also make it more special by making latik/coconut caramel as its sauce.  It is a condiment derived when you reduce coconut and sugar.

Turon is one of our favorite Filipino snacks because my kids really loves Lumpia and turon is the sweet version of it. They like the crunchiness of the wrapper when fried. 


You will need:
6 bananas (sliced) preferably Saba/plantain 
1 cup ripe Jackfruit (strips)
2 cups brown sugar
2 pieces lumpia wrapper
2 cups cooking oil

Steps:

Peel banana and slice it in half.
Coat the banana with brown sugar
 by rolling it to a plate of sugar.
(coat it with good amount of sugar)
Place the sugar coated banana in the
 lumpia wrapper with strips of jackfruit.
(you can be more generous with the jackfruit) 
The more strips of jackfruit you put, 
the more flavorful it will be.
Roll and lock the wrapper and put
 water to the edge to seal it.

Time to cook: 
Heat the oil in a cooking pot. Once the oil is hot,
 place the wrapped banana slowly,
if you have a smaller cooking pot do it by batch.
Once the turon is half cook or wrapper turns
 into very light brown, add the sugar.
Wait for the wrapper to turn to golden brown,
by that time the sugar will stick to the wrapper.
Remove it and place it on a plate.
Enjoy!


Sunday, August 28, 2016

CHOCO NUTTY BANANA MUFFIN RECIPE

You will need:

4 medium bananas
1 cup granulated sugar
1 egg
1 tsp baking powder
1 tsp baking soda
1/2 tsp salt
1 1/2 cups all-purpose flour
1/3 cup melted butter 
1 cup Chocolate chips
½ cup chopped peanuts


Steps:

Preheat oven to 350 degrees.
Combined all dry ingredients together and set aside.
Mash the bananas and add the egg, then the melted butter.
Add dry ingredients and mix in the nuts and the chocolate chips.
Pour into the greased muffin pan.
Bake for 18 - 20 minutes at 375.
 Top with peanuts and chocolate chips.


Happy cooking!

Thursday, August 25, 2016

KUTSINTA RECIPE

 Kutsinta is one of my favorite Filipino Meryenda
You may top it with shredded coconut or grated cheese.


You will need:


1½ cup rice flour
½ cup all-purpose flour
1 cup brown sugar
3 cups water
1½ tsp lye water
2 tsp anatto seeds

Steps:

Combine all the dry ingredients starting from the rice flour, 
all-purpose flour, and brown sugar then mix all the ingredients.
While mixing, add water gradually and continue to mix 
until all ingredients are completely distributed.
Add lye water and anatto water 
(soak the anatto seed in 3 tbsp water) then continue mixing.


Grease individual mold with a little butter to prevent it from sticking.


Place the mixture into individual molds and steam 
for 40 minutes to an hour.


Remove from mold and serve with shredder coconut 
or grated cheese on top.

Happy Cooking!


Recipe adapted from: Panlasang Pinoy

Wednesday, August 24, 2016

PICHI PICHI RECIPE

Pichi-pichi is one my favorite Filipino dessert. The main ingredients is cassava. 
This delicacy is originated from the Quezon Province, Philippines.

You will need:

2 cups grated cassava

1 cup white sugar

2 cups water
½ tsp lye water
food coloring of your choice


1 cup grated coconut
1 cup grated cheese (optional)

Steps:

Combine cassava, sugar, and water in a 
bowl and mix thoroughly.

Add lye water while continuously stirring the mixture.

Divide your mixture in a separate bowls
depending on how many colors you want to make.

Put-in the food coloring to the mixture.

Once the mixture is evenly distributed, 
pour in individual cup molds and place in a steamer

Steam the mixture for 45 minutes to 1 hour
(or until the color turns translucent)

Let the steamed pichi-pichi cool down at least for an hour
 then you may remove it from the molds.

Roll the each piece over the grated coconut.
(You may substitute grated coconut to grated cheese.)

Place in a serving plate then serve. 

Happy Cooking!

  Recipe adapted from: Panlasang Pinoy

Tuesday, August 23, 2016

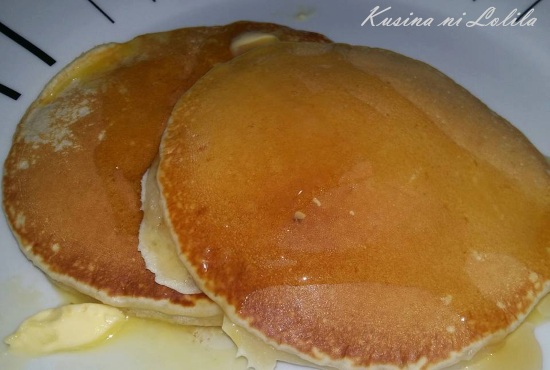
We just love Pancakes!

I just learned that pancakes are believed to be one of the earliest cereal food eaten in prehistoric age. Pancakes around the world vary and they also come in different shapes, colors and even called with different names.  I have made a dozen variations of pancakes and I still want to make some more. Here are some of my creations, I adapted the recipes from different creative cooks around the net and just made few changes of some of the ingredients. The ideas were not totally my original. Hoping I could add one pancake recipe or two recipes every week since my kids just like to eat pancakes. They don’t eat it only during breakfast, sometimes they will ask for it during snacks, lunch or even dinner. If my kids smells vanilla… they would say…. It smells like Pancake!

Apple Cinnamon Pancake


Basic Crepes


Rainbow Pancake